Author: maka

  • How to Choose the Right Guttering for Your Home

    How to Choose the Right Guttering for Your Home

    Most homes in South Florida are fitted with 5-inch K-style gutter, and on a typical single-storey roof that is the right call. The decision that actually matters is rarely the shape. It is the capacity, the thickness of the metal, and how the run is hung on the fascia — and those three are what separate a gutter that survives a hurricane season from one that comes off the house in August.

    Here is how we size a job when we come out to look at it.

    Start with the roof, not the house

    A gutter is sized by how much water reaches it, and that depends on three things: the area of roof draining into that run, how steep the roof is, and how hard it rains where you live.

    The first two are measurable on site. The third is the one homeowners underestimate. A South Florida afternoon storm can drop two inches of rain in an hour. Guttering specified for average rainfall will carry that for about ten minutes and then overshoot the front edge in a sheet — which is the moment people call us, usually while standing at a window watching it happen.

    A steep roof makes it worse. Water arrives at the eave faster and with more momentum, so some of it skips the gutter entirely rather than dropping into it. On a steep slope we either go up a size or move the run slightly out and down to catch the throw.

    Five-inch or six-inch

    Six-inch K-style carries roughly 40 percent more water than 5-inch, for a difference in price that is small next to the cost of replacing soffit. We recommend it when:

    • The catchment area draining into one run is large — long roof planes, or several planes feeding one valley.
    • The roof is steep, or it is metal, which sheds faster than shingle or tile.
    • There is nowhere sensible to add another downspout, so the existing one has to do more work.
    • The run already overflows and the gutter itself is otherwise sound.

    Six-inch gutter also pairs with a 3×4 downspout instead of the standard 2×3, and that is often the real fix. The gutter was never the bottleneck; the outlet was.

    Seamless is worth it here

    Sectional gutter comes in lengths and is joined every few feet. Every joint is a seam, every seam is sealed, and every sealant joint has a service life shorter than the metal around it. In a climate that cycles between heavy rain and hard sun, those joints are the first thing to fail.

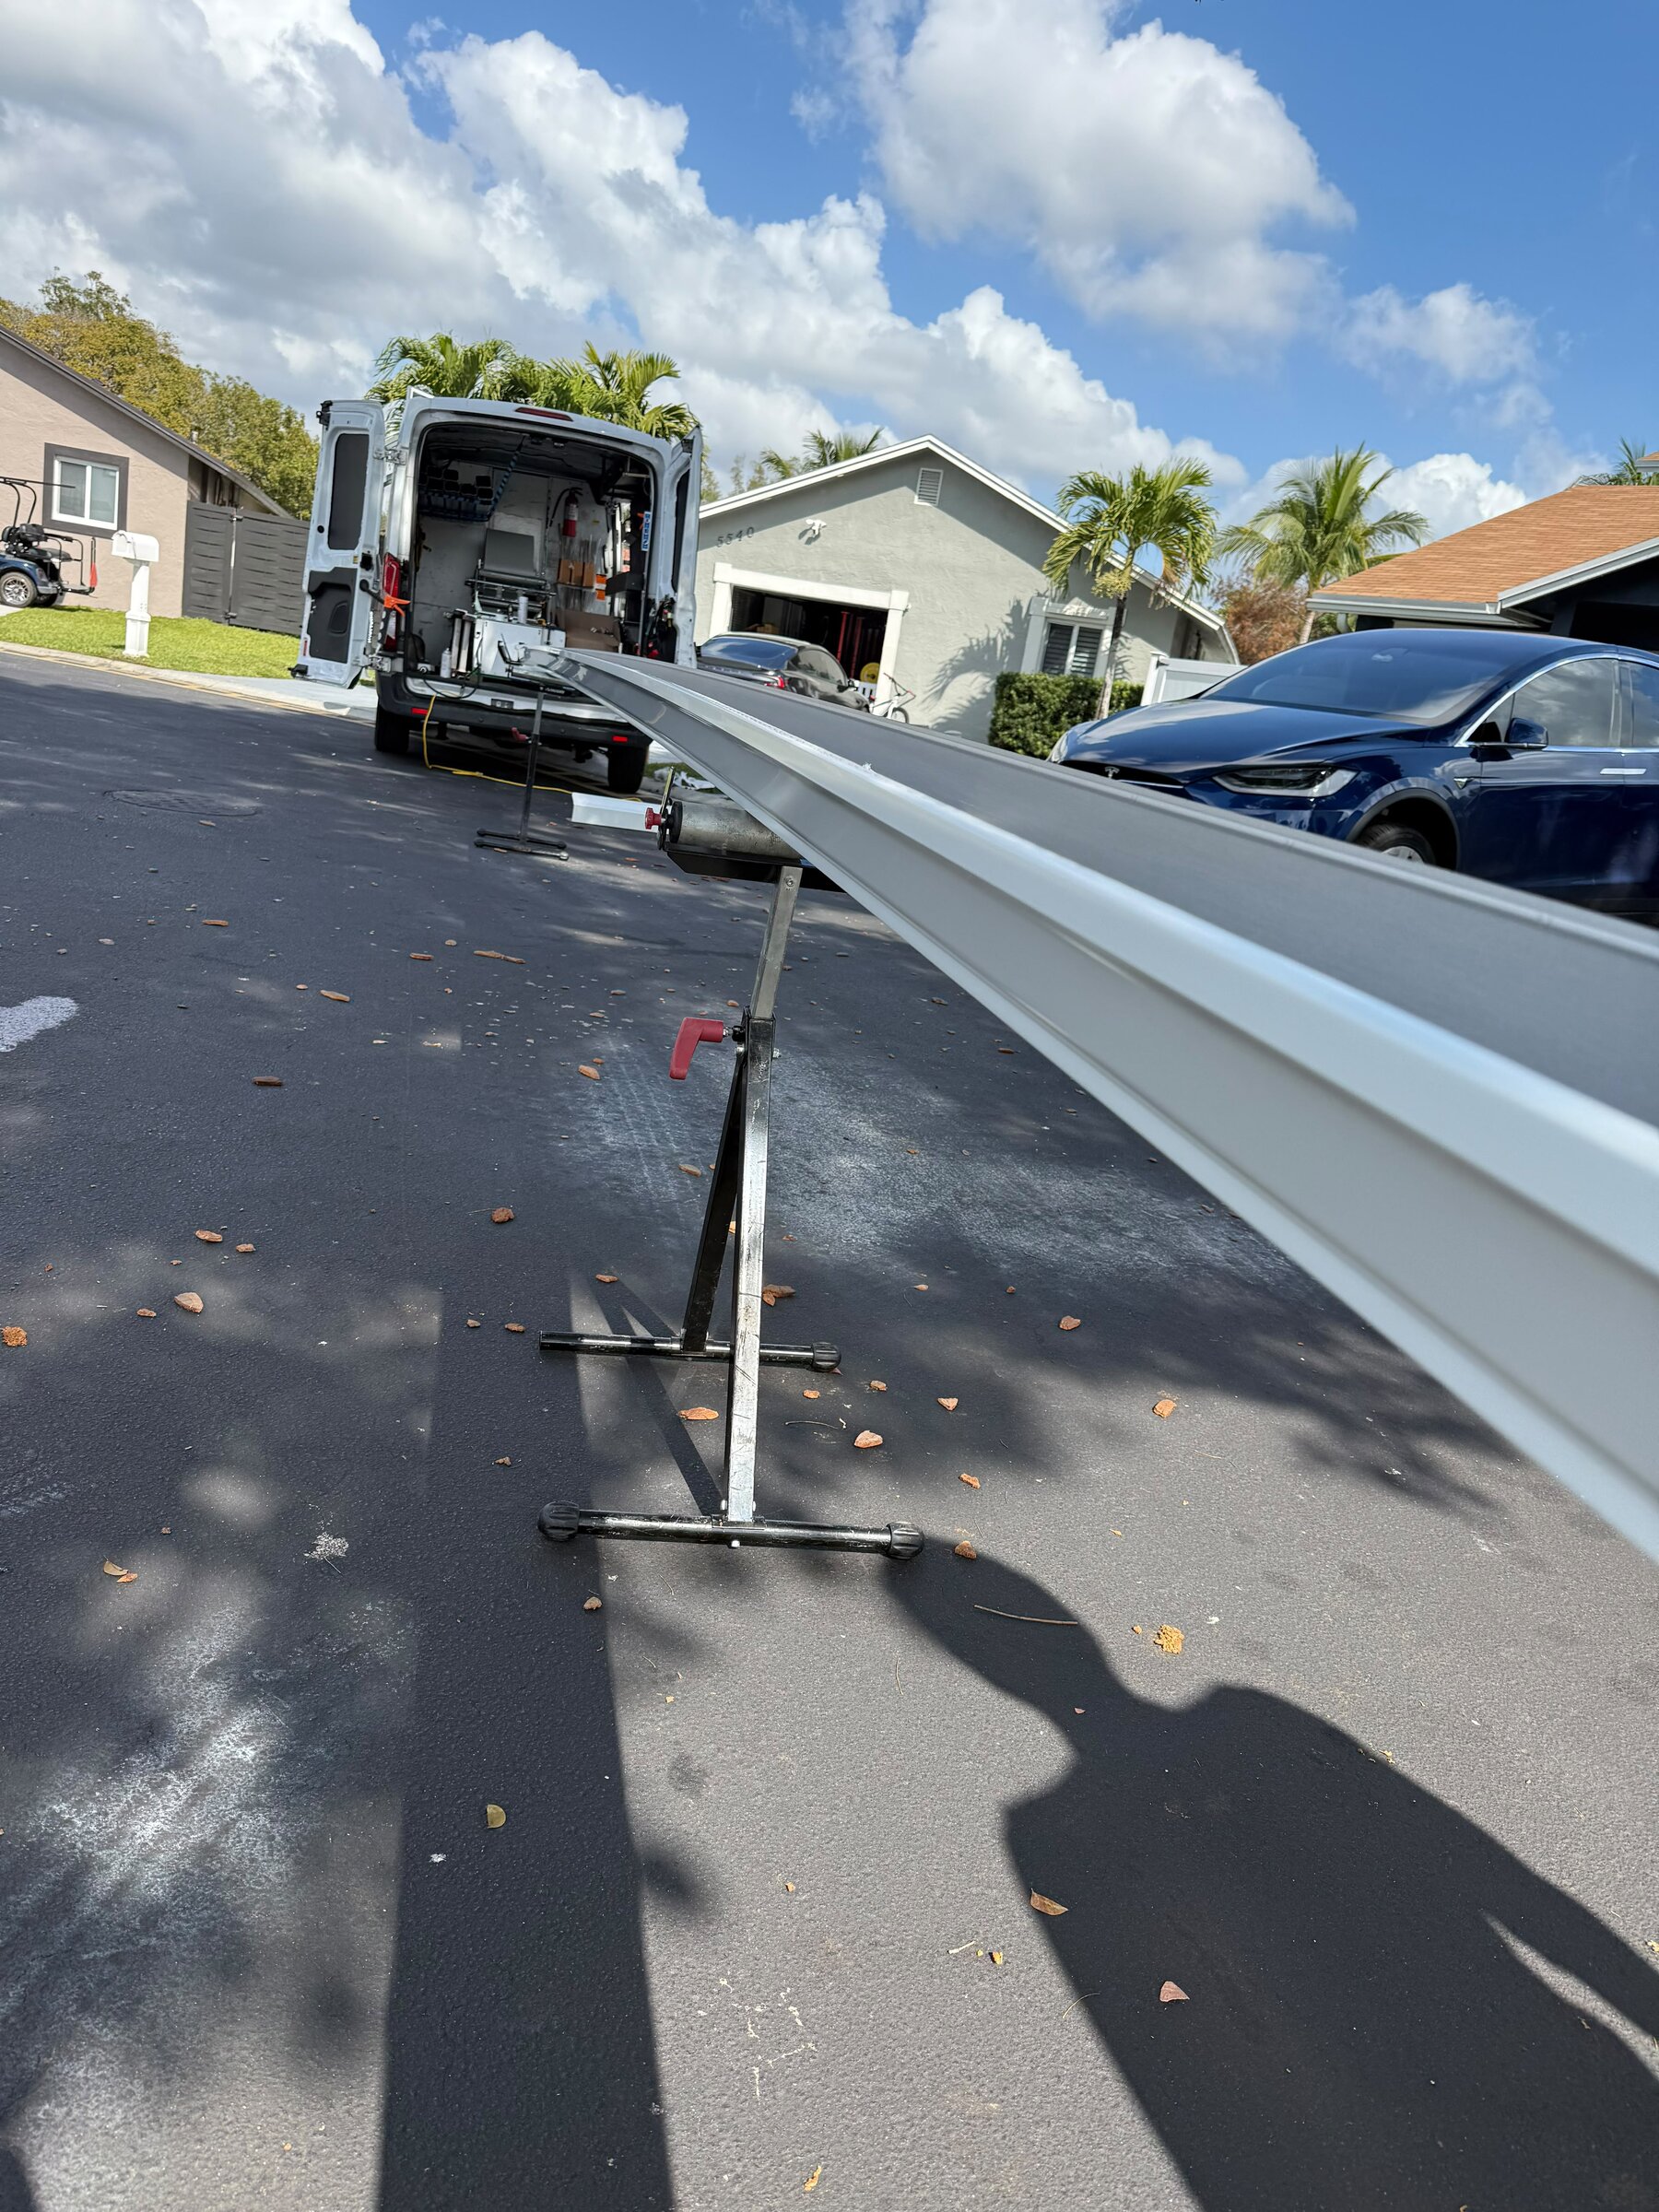
    Seamless gutter is formed on site. The machine rolls a coil of aluminium into a continuous length cut to the exact measurement of your run, so the only joints in the whole system are at the corners and the outlets. Fewer joints, fewer leaks, and no visible line every ten feet across the front of the house.

    That is the standard we install. It is not an upgrade we sell — it is what we bring on the truck.

    Thickness is the spec nobody quotes

    Aluminium gutter is commonly offered in .027 inch and .032 inch. The thinner one is cheaper and it dents — a ladder set against it, a branch, a hailstone. The thicker one holds its shape, holds a hanger screw better, and stands up to being walked past by a lawn crew every week.

    If you are comparing two quotes and one is noticeably cheaper, the gauge is the first place to look. The second is the hangers.

    Watch the hangers

    Spikes driven through the gutter into the fascia work loose. They loosen faster in wood that has already been wet, which describes a lot of fascia board in Miami-Dade and Broward. Once one lets go the run sags, water pools at the low point instead of running to the outlet, and the sag gets worse under the weight.

    Hidden hangers screwed into the fascia every two feet hold the line straight through a storm season, carry the load across more points, and are invisible from the ground. On exposed elevations and anywhere the run is long, we tighten that spacing.

    The fall is not optional

    A run has to drop about a quarter of an inch for every ten feet of length so that water moves towards the outlet instead of standing in the trough. Standing water is what breeds mosquitoes, grows the dark streaks you can see from the street, and adds weight the hangers were not sized for.

    It should not be visible from the ground. If you can see your gutter sloping, it is sloping too much — and if water sits in it after the rain stops, it is not sloping enough.

    What we do when we come out

    We measure each run, count the roof planes feeding it, look at the fascia behind the existing gutter, and tell you whether what you have needs replacing or only resealing and rehanging. Sometimes the answer is that your gutter is fine and the problem is a downspout discharging two feet from the wall.

    There is no charge for looking, and we will tell you when the cheaper repair is the right one.

    Joya General Services Gutter LLC installs seamless aluminium guttering across Opa-locka, Miami and Fort Lauderdale. Call (786) 302-1221 for a free measured quote.
  • Why Downspouts Matter More Than You Think

    Why Downspouts Matter More Than You Think

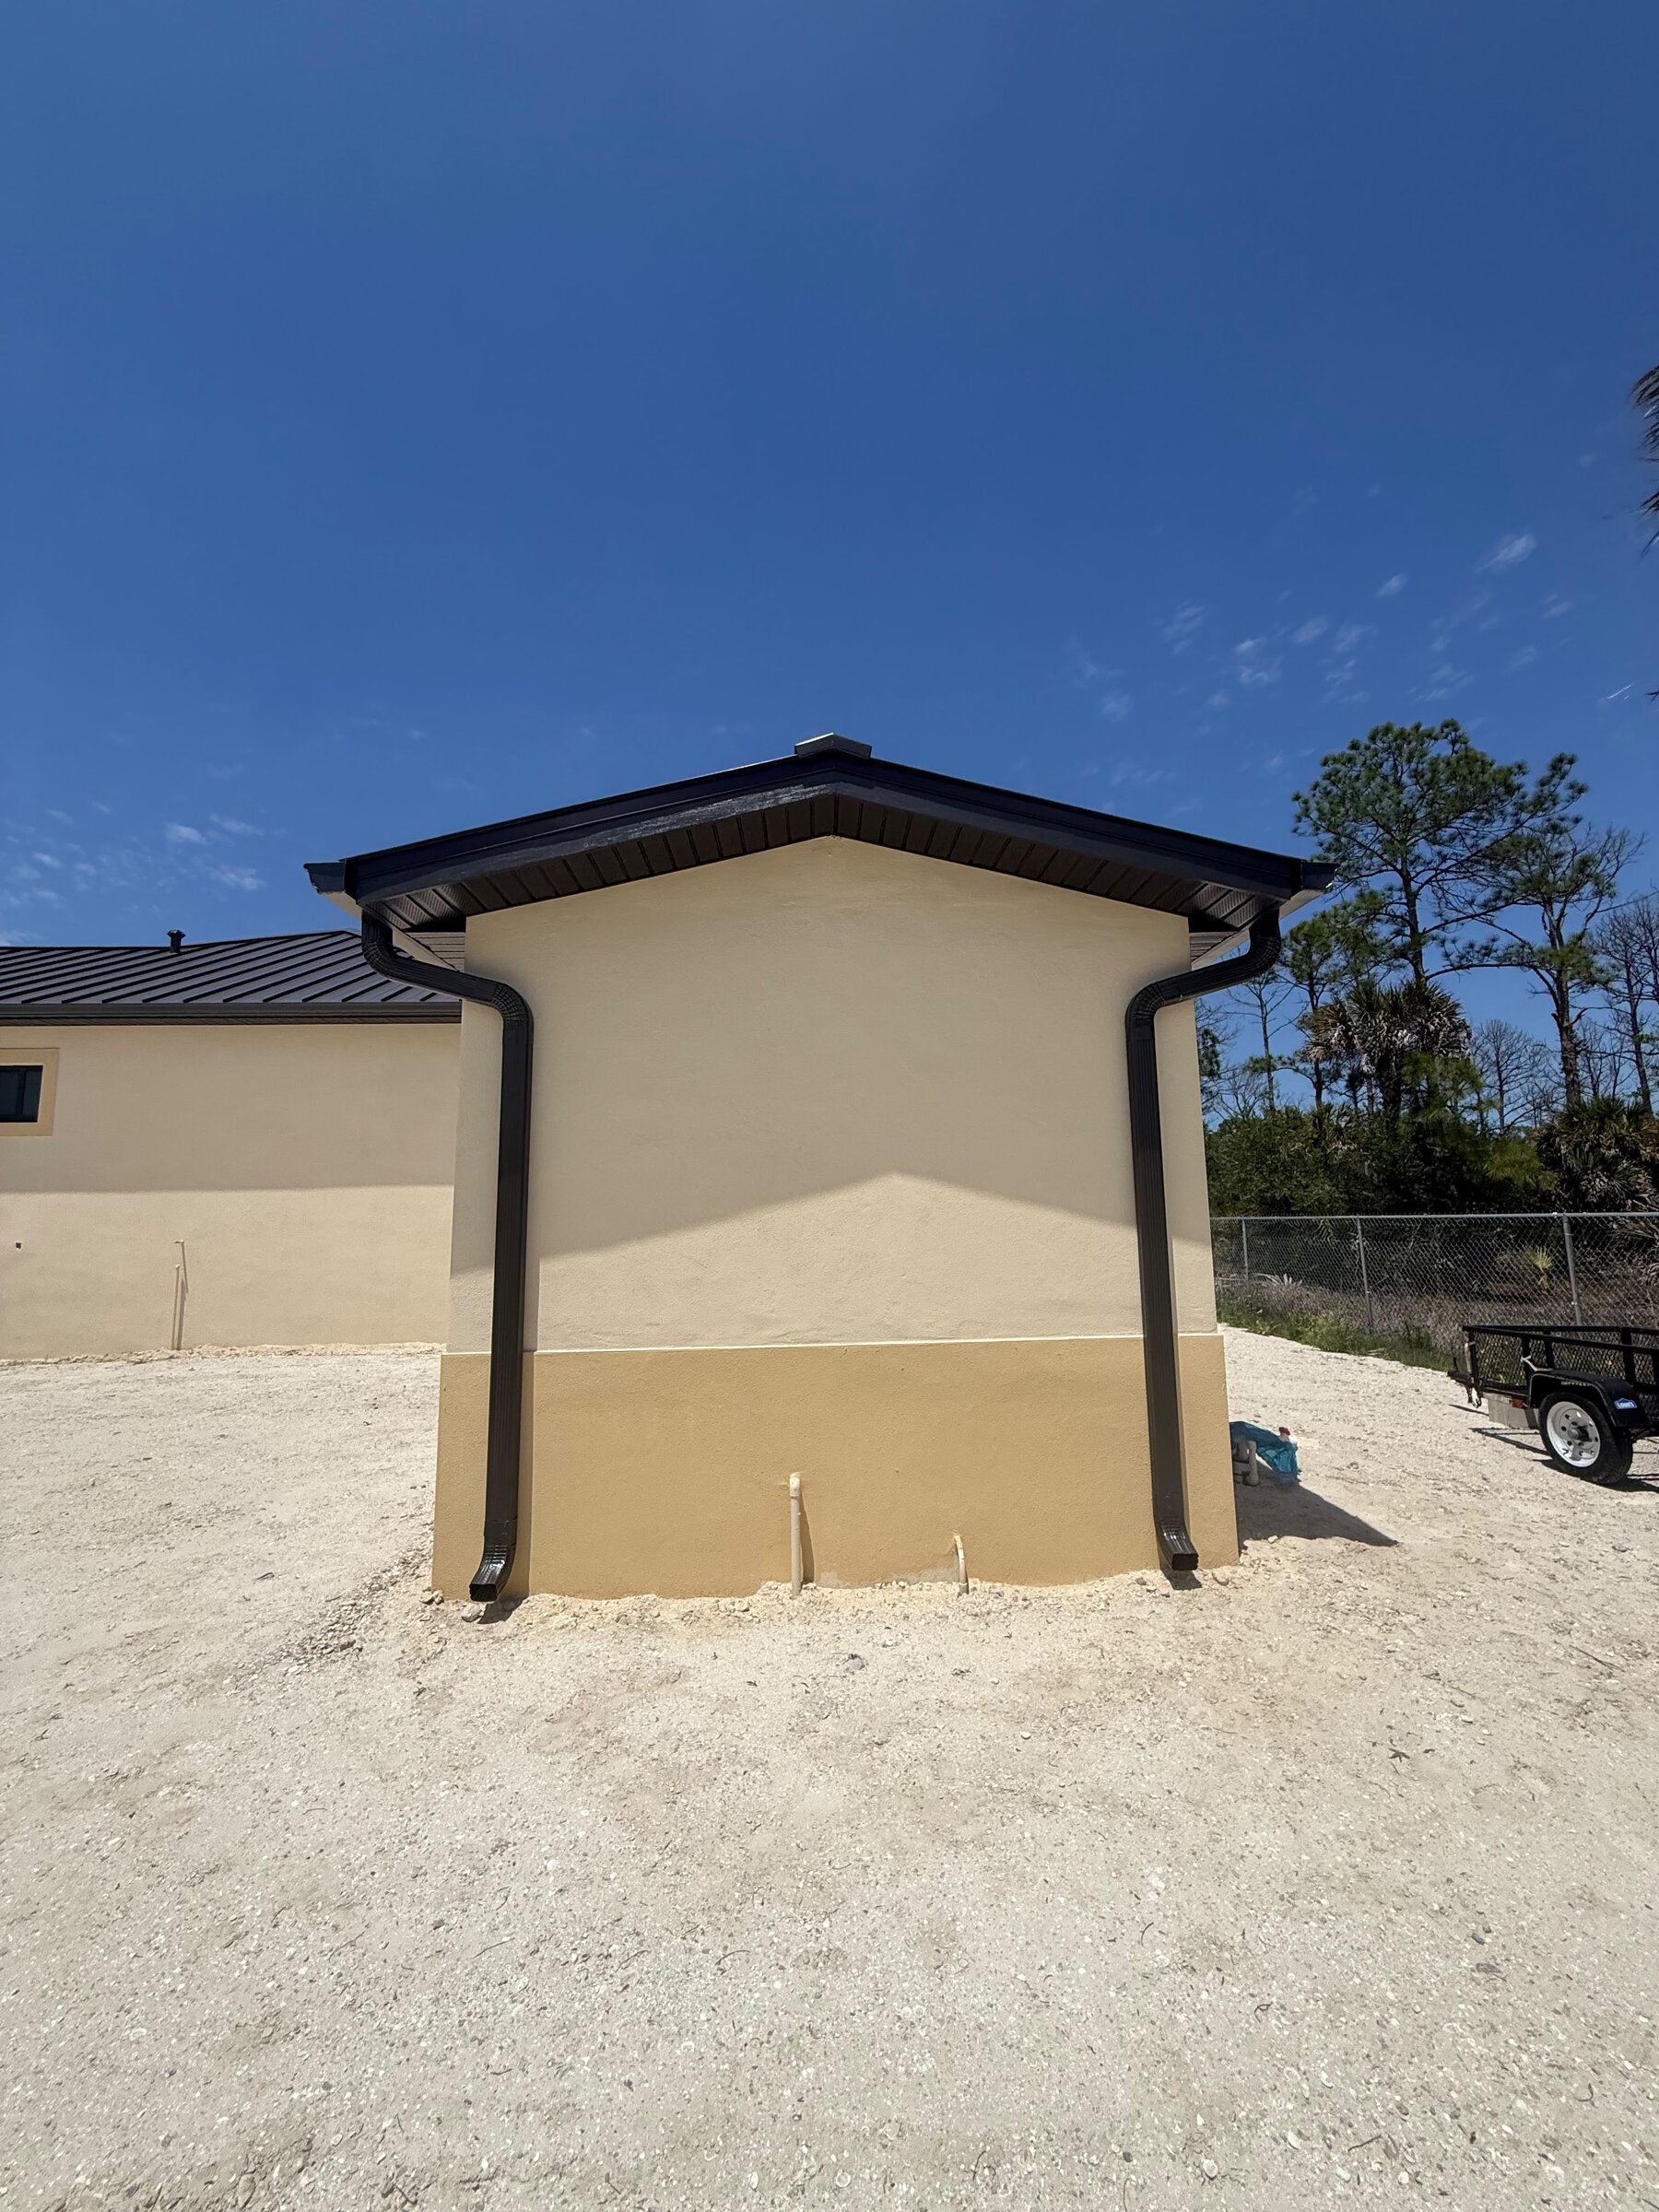
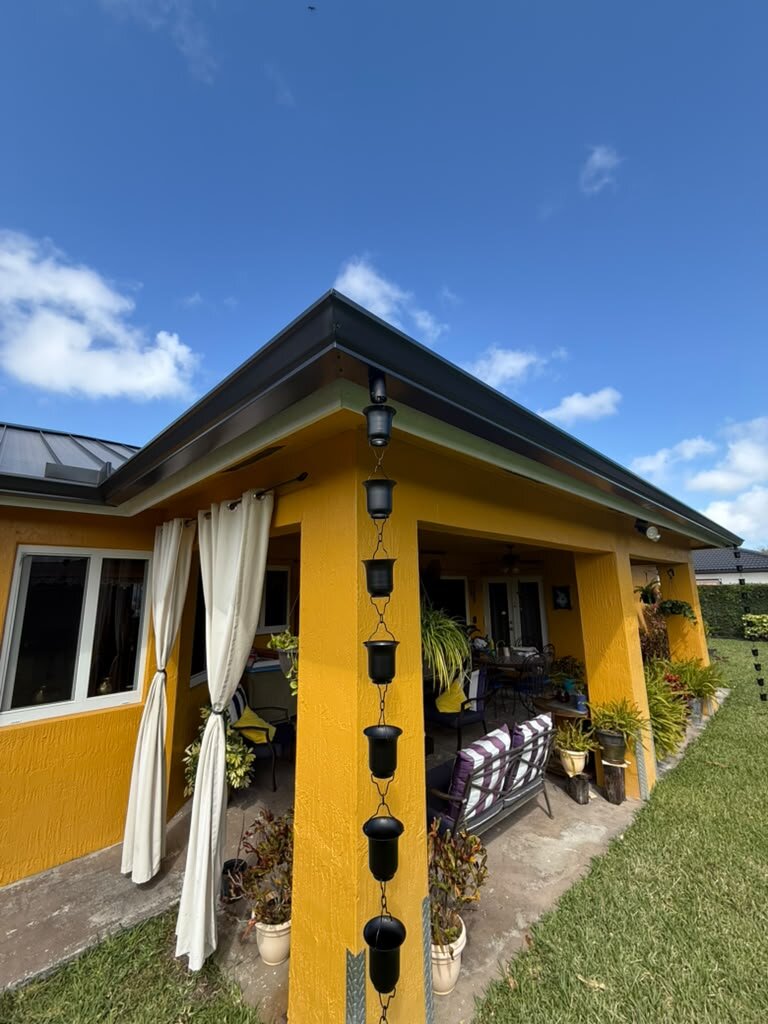
    A gutter only moves water sideways. The downspout is the part that takes it down and away from the building, and on most of the houses we are called out to, the gutter is fine and the downspouts are the problem.

    They are also the cheapest part of the system to get right. Adding an outlet costs a fraction of replacing a run, and it solves more complaints than any other single change we make.

    How many outlets a run actually needs

    The working rule is one downspout for roughly every 30 to 40 feet of gutter, and fewer than that where the roof feeding the run is large or steep. Long runs with a single outlet at one end are common on older houses here, usually because the original builder was counting corners rather than water.

    What happens is predictable. Water entering at the far end has to travel the entire length before it can leave, the trough fills faster than the one outlet can drain it, and the excess goes over the front lip somewhere in the middle. People see water pouring off the centre of a run and assume the gutter is blocked. Often it is simply outnumbered.

    Two by three, or three by four

    The standard residential downspout is 2×3 inches. The larger size is 3×4, and it moves substantially more water — close to double, in practice, because the bigger cross-section is also far less prone to jamming.

    That second point matters more than the arithmetic. A 2×3 outlet is narrow enough that a single palm frond, a tennis ball, or a season of seed pods can choke it. A 3×4 passes the same debris without stopping. On any property with trees close to the roof, we fit the larger size as a matter of course.

    Where the water lands is half the job

    A downspout that discharges at the base of the wall has moved the problem four feet, not solved it. The water now soaks into the ground directly against the foundation, which is the exact place you were trying to keep it away from.

    What the discharge point should do:

    • Carry water clear of the structure. Four to six feet is a reasonable minimum, further on a slab that sits low.
    • Release onto something that drains. Turf, gravel, a splash block — not bare soil that will wash out into a trench within a season.
    • Run away from the house, not along it. Grade matters. We check it with a level, because eyes are unreliable on a flat lot.
    • Keep clear of walkways. Water across a path is an algae problem and, eventually, somebody’s fall.

    Where there is no room for a surface extension — a narrow side yard, a paved path tight to the wall — the answer is usually a buried line running out to a pop-up emitter in the lawn. It costs more than an elbow and a splash block, and it is the right fix on a tight lot.

    Signs yours are undersized or wrongly placed

    • Water overshooting the middle of a run while the ends stay dry.
    • A gurgle or a knock from the downspout in heavy rain — air trapped behind a restriction.
    • A fan of soil or mulch washed away under the outlet.
    • A permanent damp patch on the stucco below the discharge point.
    • Water standing against the slab for hours after the rain has stopped.
    • Dark staining down the outside of the downspout itself, which means it is overflowing at a joint.

    The part that costs money later

    Water repeatedly soaking the ground against a slab does not announce itself. It shows up as a hairline crack that was not there last year, as a door that stops closing cleanly, as efflorescence — that white powder — on the inside face of a wall.

    Those are expensive to chase and cheap to prevent. A correctly sized outlet and a six-foot extension are a morning’s work.

    What we check

    When we look at a property we count the outlets against the length and the catchment area of each run, check the size of what is fitted, look at where every downspout actually discharges, and test the grade away from the wall. Then we tell you which ones need moving, which need upsizing, and which are fine as they are.

    Often the recommendation is to add one outlet. We would rather say that than sell you a new system you do not need.

    Joya General Services Gutter LLC fits and repairs downspouts and drainage across Opa-locka, Miami and Fort Lauderdale. Call (786) 302-1221 and we will come and look at no charge.

  • Why Proper Roof Drainage Is Essential

    Why Proper Roof Drainage Is Essential

    Rainfall in South Florida does not arrive gently. An afternoon storm can drop two inches in an hour, and the wet season runs from May into October — overlapping almost exactly with hurricane season, which officially starts on 1 June and ends on 30 November.

    A drainage system that copes with ordinary rain will not necessarily cope with that. The difference between the two shows up on the building, and it shows up in a specific order.

    The fascia goes first

    When a gutter overflows, the water does not fall cleanly away from the house. Surface tension pulls a good part of it backwards, behind the gutter and down the face of the fascia board.

    That board is usually wood. It is painted, not sealed, and it is now getting wet from behind where nobody can see it and where it never dries properly. Rot starts at the hanger screws, spreads along the grain, and the first visible symptom is often the gutter itself starting to pull away — because there is nothing solid left to hold the screws.

    By then you are not buying a gutter. You are buying carpentry, then a gutter.

    Then the soffit

    Water tracking behind the fascia gets into the soffit, the underside of the overhang. Vented soffit panels are designed to let air into the roof space, which means they will also let water in.

    Signs it is already happening: staining on the soffit panels, panels sagging out of their channel, or a smell of damp under the overhang after rain. In a roof space, the same water shows up as dark patches on the underside of the deck.

    Then the wall and what is behind it

    Water running down an exterior wall finds every opening — a hairline crack in the stucco, the gap around a hose bib, the seal at a window head. Inside the wall cavity it has nowhere to go and nothing moving the air, which in this climate is all mould needs.

    Efflorescence, the chalky white bloom that appears on block and stucco, is the visible marker that water has been moving through the wall and leaving its minerals behind. It is cosmetic in itself. It is a warning about what is not cosmetic.

    Then the ground, which is the expensive one

    Water discharging against the house soaks the ground next to the slab over and over. The soil swells wet and shrinks dry, and the slab edge moves with it.

    That movement is what produces hairline cracks in a floor, a door that binds in its frame during the wet season and releases in the dry, and tiles that lift along a line. These are the repairs nobody budgets for, and the cause is usually something that cost a few hundred dollars to fix before it started.

    Outside, the same water scours a trench under the drip line, undermines the edge of a driveway or a paver path, and carries mulch and soil out across the walkway with every storm.

    What correct drainage actually looks like

    • Capacity matched to the roof. The run is sized for the area draining into it, not for what fits the look of the house.
    • Enough outlets. One downspout for roughly every 30 to 40 feet of run, more where the catchment is large.
    • Fall towards the outlets. About a quarter inch per ten feet, so nothing stands in the trough.
    • Secure hanging. Hidden hangers into sound fascia every two feet, so a storm does not take the run with it.
    • Discharge well clear of the building. Four to six feet minimum, onto ground that drains, sloping away.
    • Nothing blocked. Capacity you cannot use is not capacity.

    Before the season, not during it

    The useful window for this work is spring, before the wet season builds. Once the storms are arriving weekly, every gutter company in Miami-Dade and Broward is booked, and the work gets done between downpours.

    If you only do one thing, walk the perimeter during the next heavy rain and watch where the water goes. Overflow, a stream running down a wall, or a puddle sitting against the slab tells you more in five minutes than an inspection on a dry day.

    Joya General Services Gutter LLC designs and fits rainwater drainage across Opa-locka, Miami and Fort Lauderdale. Call (786) 302-1221 and we will come and tell you what your roof is actually doing with its water.

  • What a Gutter Inspection Actually Checks

    What a Gutter Inspection Actually Checks

    A proper look at a gutter system takes about twenty minutes and covers six things. It is done from a ladder, not from the driveway. If someone quotes you a replacement without going up, they are guessing — and guessing always comes out at “you need a whole new system”.

    This is what we check, in the order we check it, so you know what a real inspection looks like and can tell when you are not getting one.

    1. The fall

    A run should drop about a quarter of an inch for every ten feet so water moves to the outlet instead of standing in the trough.

    We check it with a level and, better, with water. Standing water after rain means the fall is wrong or a hanger has let go and the run is sagging. Water sitting in a gutter breeds mosquitoes, adds weight the hangers were not sized for, and leaves the dark tide line you can see from the street.

    2. The hangers and the fascia behind them

    We check how the run is attached and what it is attached to. Spikes work loose over time, especially in fascia that has been wet. Hidden hangers should be in at about two-foot spacing, tighter on long or exposed runs.

    Then we check the board itself. A screw is only as good as the wood holding it, and soft fascia is the single most common thing that turns a repair into a bigger job. We press along the board behind the gutter — if it gives, you need carpentry before you need guttering, and we will say so.

    3. The seams and the sealant

    On a sectional system, every joint gets checked. Sealant has a service life considerably shorter than the metal it is sealing, and in this climate it cracks, shrinks and lifts at the edges.

    On a seamless system there are only corners and outlets to check, which is the point of fitting it. Corners are still the place to look: they take the most movement and they are where almost every seamless leak we find turns out to be.

    4. The outlets and the downspouts

    We count the outlets against the length of the run and the roof area feeding it, and we check the size of what is fitted — 2×3 or 3×4.

    Then we check whether they are clear. The usual blockage is not in the gutter at all; it is in the elbow at the top of the downspout, where the pipe turns and debris stops moving. We flush it and listen. A downspout that gurgles or knocks in heavy rain is telling you there is a restriction in it.

    5. Where the water goes after the downspout

    This is the step most often skipped and it is the one that causes the expensive damage. We look at where each downspout discharges, how far that is from the wall, and which way the ground slopes once the water lands.

    A system can be in perfect condition from the roof to the bottom of the downspout and still be soaking the foundation.

    6. The roof edge and the drip line

    Last, we look at the relationship between the roof and the gutter: whether the drip edge delivers water into the trough or behind it, whether a steep plane is throwing water clean over the front lip, and whether tiles or shingles at the eave have moved.

    We also look at the ground under the drip line. A trench scoured into soil or mulch tells you where the system has been overflowing, even if you have never seen it happen.

    What you should get at the end

    You should be told three things, plainly: what is wrong, what it will cost to fix, and what is fine and does not need touching. That last one is the test. An inspection that finds every component defective is a sales call.

    You should also be told what is urgent and what can wait until next season. Not everything needs doing now, and we would rather schedule the roof-edge repair before the wet season and leave the cosmetic staining for later.

    How often

    Once a year for most properties here, and twice where there are trees close to the roof — once before the wet season and once after the leaves drop. If a storm has been through, look sooner.

    Joya General Services Gutter LLC inspects gutter systems across Opa-locka, Miami and Fort Lauderdale. The look is free. Call (786) 302-1221.

  • Gutter Guards: What They Do and What They Do Not

    Gutter Guards: What They Do and What They Do Not

    Gutter guards are worth fitting on most South Florida properties with trees near the roof. They are not the maintenance-free promise some of the advertising makes them, and a company that tells you that you will never go up a ladder again is selling you something.

    Here is the honest version: what they do, what they do not, and which types are worth the money here.

    What they do

    • Keep leaves, twigs and seed pods out of the trough. This is the main job and a decent guard does it well.
    • Stretch the interval between cleanings. A property that needed clearing three times a year typically goes to once.
    • Stop the trough from becoming a nursery. Mosquitoes breed in standing water held by debris. Less debris, less standing water.
    • Keep birds and rodents out. An open gutter packed with dry material is a nesting site. A screened one is not.
    • Reduce the weight the hangers carry. Wet, packed debris is heavy, and that weight is what pulls runs out of line.

    What they do not

    • They do not eliminate maintenance. Fine material still gets through a mesh, and whatever lands on top of a guard has to be brushed off or it mats and sheds water over the edge.
    • They do not fix a gutter that is the wrong size. If the run overflows because it is undersized or short of outlets, a guard changes nothing — and a badly chosen one makes it worse by narrowing the opening.
    • They do not fix fall. Standing water from a sagging run stays standing under a guard, and you can no longer see it.
    • They do not stop pollen, shingle grit or the fine black sediment that builds into a sludge in the bottom of the trough.
    • They do not survive being walked on. Anyone who puts a ladder against a guarded gutter without knowing what they are doing will deform it.

    The types, and which work here

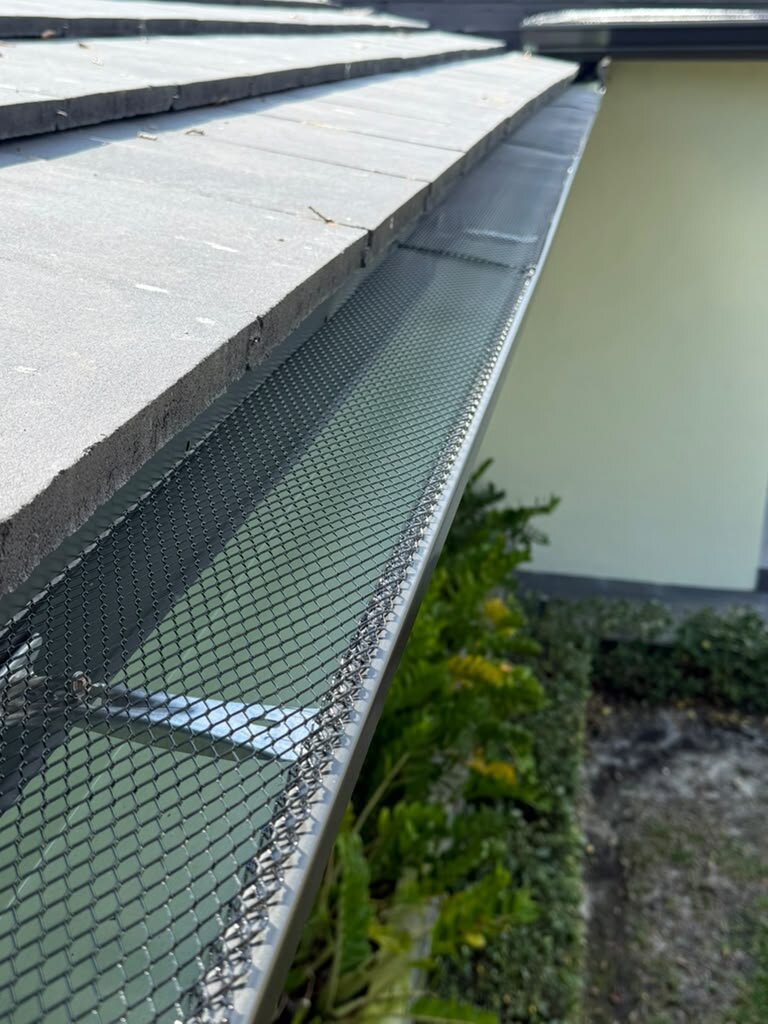
    Aluminium or stainless mesh. A perforated or woven screen over the trough. Good balance of cost and performance, and the type we fit most often. Stainless outlasts aluminium near salt air, which matters on the coast.

    Micro-mesh. A much finer screen, usually stainless on a frame. It stops the small material the standard mesh passes, and it is the best option under pines or anything that drops needles. It costs more and it needs the top brushed off occasionally, because fine mesh is exactly what pollen and dust mat onto.

    Reverse curve, or surface tension. A solid cover with a lip, relying on water clinging around the curve and into a slot while debris falls past. It works in moderate rain. In a two-inch-an-hour storm, a volume of water that is moving fast does not cling to anything — it carries straight over the lip and onto the ground. We do not recommend them here for that reason.

    Foam inserts. A block of foam filling the trough. Cheap, easy, and they degrade in UV, hold moisture against the metal, and eventually grow things. They are a short-term fix sold as a permanent one.

    Brush inserts. A large bottle brush laid in the gutter. Debris collects in the bristles rather than in the trough, which means you still have to pull the brush out to clean it. Marginally better than nothing.

    The South Florida specifics

    Royal palms shed fronds and seed pods that no guard will handle gracefully — a frond lands on top and sits there. If you have palms over the roof, plan on brushing the guards rather than clearing the gutters, and fit 3×4 downspouts so that anything which does get through keeps moving.

    Near the ocean, salt air eats cheap aluminium screen and the steel fasteners holding it. Stainless costs more at fitting and less over ten years.

    And whatever you fit, it has to be installed without lifting the roof edge. Guards that slide up under the first course of shingles or tiles can break the water seal at the eave, which trades a gutter problem for a roof problem. We fit to the gutter, not to the roof.

    Is it worth it

    Run the arithmetic on your own property. If you are paying for three clearings a year, guards typically pay for themselves in two to four years and remove the part of the job you dislike most — the ladder.

    If you have no trees near the roof and you clear the gutters once a year without much trouble, you probably do not need them, and we will tell you that.

    Joya General Services Gutter LLC fits gutter guards across Opa-locka, Miami and Fort Lauderdale. Call (786) 302-1221 and we will look at what is actually landing on your roof before recommending anything.

  • After a Storm: What to Look at First

    After a Storm: What to Look at First

    The hour after a storm passes is the best time to find out whether your drainage held. Everything is still wet, so the evidence is still on the ground, and anything that failed is usually still visible from where you are standing.

    Wait until the lightning has moved off, then walk the perimeter. You are not climbing anything — this is all from the ground.

    Walk the perimeter and look down first

    Start with the ground under the drip line, because it records what happened while you were inside.

    • Puddles against the wall or the slab. Water should be moving away from the building, not pooling against it. A puddle that is still there an hour later is the one to deal with.
    • Mulch or soil washed out in a fan shape. That marks a discharge point that is dumping water too close and too fast.
    • A trench or a line of scoured soil under the eave. That is an overflow. The gutter above it either blocked, sagged, or ran out of capacity.
    • Grit or granules on the ground under a downspout. If you have a shingle roof, that is roof material coming down the system, which is worth knowing about.

    Then look up at the line of the gutter

    Stand back far enough to see the whole run against the roof edge.

    • A dip or a wave in a run that used to be straight. A hanger has let go, or the fascia behind it has given.
    • A gap between the gutter and the fascia. The run is pulling away. This gets worse with the next storm, not better.
    • Water still dripping from a joint twenty minutes after the rain stopped. A seam has opened.
    • A section lower at one end than it was. Compare against a door frame or a window head; the roof line is a poor reference.
    • Anything lying in the trough that you can see from the ground — a frond, a branch, roof debris.

    Check the downspouts

    Look at each one from top to bottom. A downspout that stayed dry while everything around it was soaked is blocked. So is one with a visible bulge, or a seam that has opened down its length.

    Check that the extension at the bottom is still where it should be. Splash blocks and flexible extensions get moved by water, by lawn crews, and by wind — and nobody notices until the wall below starts staining.

    Check the walls and the soffit

    Look for a vertical stain down the stucco, which marks water that came over the front of the gutter or out of a joint. Look at the underside of the overhang for new staining or a panel that has dropped out of its channel.

    Inside, look at the top corners of rooms on the perimeter, especially under a run that you know overflowed. A fresh damp patch at a ceiling edge after a storm is a drainage problem until proven otherwise.

    Photograph anything you find, now

    Before anything dries or gets cleaned up, take pictures. Wide shot for context, close shot for detail, and include something for scale.

    If you end up making an insurance claim, photographs taken the same day are worth considerably more than a description given three weeks later. Date them by leaving the camera metadata intact — do not crop and re-save.

    What is urgent and what can wait

    Deal with now: a run pulling away from the fascia, a section hanging loose, any water getting inside, a blocked downspout on an elevation that overflows towards the house.

    Can wait for a scheduled visit: staining, a single open seam that drips, debris in the trough, an extension that needs repositioning, cosmetic denting.

    The distinction is whether the next storm makes it worse. A loose run will come further off. A stain will still be a stain.

    What not to do

    Do not put a ladder against a gutter to check it yourself after a storm. The ground is soft, the gutter may already be unsupported, and the thing you are leaning on is the thing that is broken. More people are hurt inspecting storm damage than in the storm.

    If it needs someone up there, that is what we are for.

    Joya General Services Gutter LLC handles storm damage and repairs across Opa-locka, Miami and Fort Lauderdale, and answers the phone on storm calls out of hours. Call (786) 302-1221.

  • Después de una tormenta: qué revisar primero

    Después de una tormenta: qué revisar primero

    La hora siguiente a que pasa una tormenta es el mejor momento para saber si su drenaje aguantó. Todo está todavía mojado, así que la evidencia sigue en el suelo, y lo que falló normalmente se ve desde donde usted está parado.

    Espere a que los rayos se hayan alejado y camine el perímetro. No va a subir a ningún lado — todo esto se hace desde el piso.

    Camine el perímetro y mire primero hacia abajo

    Empiece por el terreno bajo la línea de goteo, porque es el que guarda el registro de lo que pasó mientras usted estaba adentro.

    • Charcos contra la pared o la losa. El agua debería estar alejándose del edificio, no empozándose contra él. Un charco que sigue ahí una hora después es el que hay que atender.
    • Mulch o tierra lavada en forma de abanico. Eso marca un punto de descarga que está botando agua demasiado cerca y demasiado fuerte.
    • Una zanja o una línea de tierra socavada bajo el alero. Eso es un desborde. La canaleta de arriba se tupió, se hundió o se quedó sin capacidad.
    • Granulado en el suelo debajo de un bajante. Si su techo es de shingle, eso es material del techo bajando por el sistema, y conviene saberlo.

    Después mire la línea de la canaleta

    Párese lo bastante lejos para ver la corrida completa contra el borde del techo.

    • Un hundimiento o una onda en una corrida que antes era recta. Cedió un soporte, o cedió la fascia detrás.
    • Una separación entre la canaleta y la fascia. La corrida se está despegando. Con la próxima tormenta empeora, no mejora.
    • Agua todavía goteando de una unión veinte minutos después de que paró de llover. Se abrió una costura.
    • Una sección más baja de un lado que antes. Compárela con el marco de una puerta o el cabezal de una ventana; la línea del techo es mala referencia.
    • Cualquier cosa tirada dentro del canal que se vea desde abajo — una penca, una rama, basura del techo.

    Revise los bajantes

    Mire cada uno de arriba abajo. Un bajante que quedó seco mientras todo alrededor se empapaba está tupido. También lo está uno con un abombamiento visible, o con una costura abierta a lo largo.

    Compruebe que la extensión de abajo siga donde tiene que estar. Los bloques difusores y las extensiones flexibles los mueve el agua, los mueve el jardinero y los mueve el viento — y nadie se da cuenta hasta que la pared de abajo empieza a mancharse.

    Revise las paredes y el sofito

    Busque una mancha vertical bajando por el repello, que marca el agua que se fue por el frente de la canaleta o salió de una unión. Mire la cara inferior del alero por manchas nuevas o un panel que se haya salido de su canal.

    Por dentro, mire las esquinas altas de los cuartos del perímetro, sobre todo debajo de una corrida que usted sabe que se desbordó. Una mancha de humedad fresca en el borde del techo raso después de una tormenta es un problema de drenaje hasta que se demuestre lo contrario.

    Fotografíe ahora lo que encuentre

    Antes de que algo seque o se recoja, tome fotos. Una abierta para el contexto, una cercana para el detalle, y meta algo que dé escala.

    Si termina haciendo un reclamo al seguro, las fotos del mismo día valen bastante más que una descripción dada tres semanas después. Déjeles la fecha: no las recorte ni las vuelva a guardar, porque eso borra los datos de la cámara.

    Qué es urgente y qué puede esperar

    Atender ahora: una corrida despegándose de la fascia, una sección colgando, cualquier agua entrando adentro, un bajante tupido en una fachada que desborda hacia la casa.

    Puede esperar a una visita programada: manchas, una sola costura abierta que gotea, basura en el canal, una extensión que hay que reacomodar, abolladuras cosméticas.

    La diferencia está en si la próxima tormenta lo empeora. Una corrida floja se va a soltar más. Una mancha va a seguir siendo una mancha.

    Lo que no debe hacer

    No recueste una escalera sobre una canaleta para revisarla usted mismo después de una tormenta. El terreno está blando, la canaleta puede estar ya sin apoyo, y la cosa en la que se está apoyando es la que está rota. Se lesiona más gente revisando daños que durante la propia tormenta.

    Si hay que subir, para eso estamos nosotros.

    Joya General Services Gutter LLC atiende daños por tormenta y reparaciones en Opa-locka, Miami y Fort Lauderdale, y contesta el teléfono fuera de horario en llamadas de tormenta. Llame al (786) 302-1221.

  • Protectores de canaletas: lo que hacen y lo que no

    Protectores de canaletas: lo que hacen y lo que no

    Los protectores de canaletas valen la pena en la mayoría de las propiedades del sur de la Florida que tienen árboles cerca del techo. No son la promesa de cero mantenimiento que sugiere parte de la publicidad, y la compañía que le diga que nunca más va a subir una escalera le está vendiendo algo.

    Esta es la versión honesta: lo que hacen, lo que no hacen y cuáles tipos valen el dinero aquí.

    Lo que hacen

    • Mantienen hojas, ramitas y semillas fuera del canal. Ese es el trabajo principal y un protector decente lo hace bien.
    • Alargan el intervalo entre limpiezas. Una propiedad que necesitaba limpieza tres veces al año normalmente pasa a una.
    • Evitan que el canal se vuelva un criadero. El mosquito se reproduce en el agua detenida por la basura. Menos basura, menos agua detenida.
    • Dejan fuera a pájaros y roedores. Una canaleta abierta llena de material seco es un sitio de anidación. Una con malla no.
    • Reducen el peso que cargan los soportes. La basura mojada y compactada pesa, y ese peso es lo que saca las corridas de línea.

    Lo que no hacen

    • No eliminan el mantenimiento. El material fino igual pasa la malla, y lo que cae encima del protector hay que barrerlo o se apelmaza y bota el agua por el borde.
    • No arreglan una canaleta del tamaño equivocado. Si la corrida se desborda porque quedó corta o le faltan salidas, el protector no cambia nada — y uno mal escogido lo empeora al estrechar la entrada.
    • No arreglan la caída. El agua parada de una corrida hundida sigue parada debajo del protector, y ahora usted no puede verla.
    • No detienen el polen, el granulado de las shingles ni el sedimento negro fino que se acumula como lodo en el fondo del canal.
    • No aguantan que los pisen. Cualquiera que recueste una escalera sobre una canaleta con protector sin saber lo que hace, la deforma.

    Los tipos, y cuáles sirven aquí

    Malla de aluminio o acero inoxidable. Una pantalla perforada o tejida sobre el canal. Buen equilibrio entre costo y rendimiento, y es el tipo que más instalamos. El inoxidable dura más que el aluminio cerca del aire salino, lo que importa en la costa.

    Micro-malla. Una pantalla mucho más fina, normalmente de inoxidable sobre un marco. Detiene el material pequeño que la malla común deja pasar, y es la mejor opción debajo de pinos o de cualquier cosa que suelte agujas. Cuesta más y hay que barrerle la parte de arriba de vez en cuando, porque una malla fina es exactamente donde se apelmazan el polen y el polvo.

    Curva invertida, o de tensión superficial. Una tapa sólida con un labio, que depende de que el agua se adhiera a la curva y entre por una ranura mientras la basura cae de largo. Funciona con lluvia moderada. En una tormenta de dos pulgadas por hora, un volumen de agua que va rápido no se adhiere a nada — pasa derecho por encima del labio y cae al suelo. Por eso no los recomendamos aquí.

    Insertos de espuma. Un bloque de espuma que llena el canal. Baratos, fáciles, y se degradan con el sol, retienen humedad contra el metal y con el tiempo les crece cosa adentro. Son un arreglo temporal vendido como permanente.

    Insertos de cepillo. Un cepillo grande acostado dentro de la canaleta. La basura se junta en las cerdas en vez de en el canal, lo que significa que igual hay que sacar el cepillo para limpiarlo. Apenas mejor que nada.

    Lo específico del sur de la Florida

    Las palmas reales sueltan pencas y racimos de semillas que ningún protector maneja con elegancia — una penca cae encima y ahí se queda. Si tiene palmas sobre el techo, cuente con barrer los protectores en vez de limpiar las canaletas, e instale bajantes de 3×4 para que lo que sí pase siga moviéndose.

    Cerca del mar, el aire salino se come la malla de aluminio barata y los tornillos de acero que la sujetan. El inoxidable cuesta más al instalar y menos a diez años.

    Y sea cual sea el que instale, tiene que ponerse sin levantar el borde del techo. Los protectores que se meten por debajo de la primera hilera de shingles o tejas pueden romper el sello de agua del alero, lo que cambia un problema de canaleta por un problema de techo. Nosotros fijamos a la canaleta, no al techo.

    ¿Vale la pena?

    Saque la cuenta en su propia propiedad. Si está pagando tres limpiezas al año, los protectores normalmente se pagan solos en dos a cuatro años y le quitan la parte del trabajo que menos le gusta: la escalera.

    Si no tiene árboles cerca del techo y limpia las canaletas una vez al año sin mucho problema, probablemente no los necesita, y se lo vamos a decir.

    Joya General Services Gutter LLC instala protectores de canaletas en Opa-locka, Miami y Fort Lauderdale. Llame al (786) 302-1221 y vamos a ver qué está cayendo de verdad sobre su techo antes de recomendarle nada.

  • Qué revisa de verdad una inspección de canaletas

    Qué revisa de verdad una inspección de canaletas

    Mirar bien un sistema de canaletas toma unos veinte minutos y cubre seis cosas. Se hace desde una escalera, no desde la entrada de autos. Si alguien le cotiza un cambio completo sin subir, está adivinando — y adivinar siempre termina en “hay que cambiarlo todo”.

    Esto es lo que revisamos, en el orden en que lo revisamos, para que usted sepa cómo se ve una inspección de verdad y pueda darse cuenta cuando no se la están haciendo.

    1. La caída

    Una corrida debe bajar alrededor de un cuarto de pulgada por cada diez pies para que el agua camine hacia la salida en vez de quedarse parada en el canal.

    Lo comprobamos con nivel y, mejor todavía, con agua. Agua parada después de llover significa que la caída está mal o que un soporte cedió y la corrida se hundió. El agua detenida en una canaleta cría mosquitos, agrega un peso para el que los soportes no fueron calculados y deja la línea oscura que se ve desde la calle.

    2. Los soportes y la fascia detrás de ellos

    Revisamos cómo está sujeta la corrida y a qué está sujeta. Los clavos se aflojan con el tiempo, sobre todo en fascia que ya estuvo mojada. Los soportes ocultos deben ir espaciados unos dos pies, más cerrado en corridas largas o expuestas.

    Después revisamos la tabla misma. Un tornillo vale lo que vale la madera que lo sostiene, y la fascia blanda es la causa número uno de que una reparación se convierta en un trabajo mayor. Presionamos a lo largo de la tabla detrás de la canaleta — si cede, usted necesita carpintería antes que canaletas, y se lo vamos a decir.

    3. Las costuras y el sellador

    En un sistema por secciones se revisa cada unión. El sellador dura bastante menos que el metal que está sellando, y en este clima se agrieta, se encoge y se levanta por los bordes.

    En un sistema sin costuras solo hay esquinas y salidas que revisar, que es justamente para lo que se instala. Las esquinas siguen siendo el punto a mirar: reciben el mayor movimiento y ahí es donde aparece casi toda filtración que encontramos en canaleta sin costuras.

    4. Las salidas y los bajantes

    Contamos las salidas contra el largo de la corrida y el área de techo que la alimenta, y revisamos el tamaño de lo instalado — 2×3 o 3×4.

    Después comprobamos que estén libres. La obstrucción común no está en la canaleta: está en el codo arriba del bajante, donde el tubo gira y la basura deja de moverse. Lo lavamos y escuchamos. Un bajante que gorgotea o golpetea cuando llueve fuerte le está diciendo que tiene una restricción.

    5. A dónde va el agua después del bajante

    Este es el paso que más se salta y el que causa el daño caro. Miramos dónde descarga cada bajante, a qué distancia queda eso de la pared y hacia dónde cae el terreno una vez que el agua aterriza.

    Un sistema puede estar en perfecto estado desde el techo hasta el pie del bajante y aun así estar empapando la cimentación.

    6. El borde del techo y la línea de goteo

    Por último miramos la relación entre el techo y la canaleta: si el borde de goteo entrega el agua dentro del canal o por detrás, si un plano inclinado está lanzando el agua por encima del borde delantero, y si las tejas o shingles del alero se movieron.

    También miramos el terreno bajo la línea de goteo. Una zanja cavada en la tierra o el mulch le dice dónde ha estado desbordándose el sistema, aunque usted nunca lo haya visto pasar.

    Qué debe recibir al final

    Le deben decir tres cosas, claras: qué está mal, qué cuesta arreglarlo y qué está bien y no hay que tocar. Esa última es la prueba. Una inspección que encuentra todos los componentes defectuosos es una visita de ventas.

    También le deben decir qué es urgente y qué puede esperar a la próxima temporada. No todo hay que hacerlo ahora, y preferimos programar la reparación del borde del techo antes de la temporada de lluvia y dejar la mancha cosmética para después.

    Cada cuánto

    Una vez al año para la mayoría de las propiedades de aquí, y dos veces donde hay árboles cerca del techo — una antes de la temporada de lluvia y otra después de que caiga la hoja. Si pasó una tormenta, revise antes.

    Joya General Services Gutter LLC inspecciona sistemas de canaletas en Opa-locka, Miami y Fort Lauderdale. La revisión es gratis. Llame al (786) 302-1221.

  • Por qué un buen drenaje de techo es indispensable

    Por qué un buen drenaje de techo es indispensable

    La lluvia en el sur de la Florida no llega despacio. Una tormenta de la tarde puede dejar dos pulgadas en una hora, y la temporada de lluvia va de mayo hasta octubre — solapándose casi exactamente con la temporada de huracanes, que oficialmente empieza el 1 de junio y termina el 30 de noviembre.

    Un sistema de drenaje que aguanta lluvia normal no necesariamente aguanta eso. La diferencia entre las dos se nota en el edificio, y se nota en un orden concreto.

    Primero se va la fascia

    Cuando una canaleta se desborda, el agua no cae limpia hacia afuera. La tensión superficial se lleva buena parte hacia atrás, por detrás de la canaleta y por la cara de la tabla de fascia.

    Esa tabla casi siempre es de madera. Está pintada, no sellada, y ahora se está mojando por detrás, donde nadie la ve y donde nunca seca bien. La pudrición empieza en los tornillos de los soportes, sigue la veta, y el primer síntoma visible suele ser la canaleta despegándose — porque ya no queda nada firme que sujete los tornillos.

    A esa altura usted no está comprando una canaleta. Está comprando carpintería, y después una canaleta.

    Después el sofito

    El agua que corre detrás de la fascia se mete en el sofito, la parte de abajo del alero. Los paneles ventilados están diseñados para dejar entrar aire al techo, lo que significa que también van a dejar entrar agua.

    Señales de que ya está pasando: manchas en los paneles del sofito, paneles descolgándose de su canal, u olor a humedad debajo del alero después de llover. Dentro del entretecho, la misma agua aparece como manchas oscuras en la cara inferior de la cubierta.

    Después la pared y lo que hay dentro de ella

    El agua que baja por una pared exterior encuentra cada abertura — una grieta fina en el repello, el hueco alrededor de la llave de manguera, el sello en el cabezal de una ventana. Dentro de la pared no tiene a dónde ir y no hay aire moviéndose, que en este clima es todo lo que el moho necesita.

    La eflorescencia, ese polvo blanco que aparece sobre el bloque y el repello, es la marca visible de que el agua ha estado pasando por la pared y dejando sus minerales. En sí misma es cosmética. Es un aviso sobre algo que no lo es.

    Después el terreno, que es el caro

    El agua que descarga contra la casa empapa una y otra vez el terreno junto a la losa. El suelo se hincha mojado y se encoge seco, y el borde de la losa se mueve con él.

    Ese movimiento es lo que produce grietas finas en un piso, una puerta que se traba en temporada de lluvia y se suelta en la seca, y lozas que se levantan siguiendo una línea. Son las reparaciones que nadie presupuesta, y la causa casi siempre fue algo que costaba unos cientos de dólares arreglar antes de que empezara.

    Por fuera, esa misma agua cava una zanja bajo la línea de goteo, socava el borde de una entrada de autos o de un camino de adoquines, y se lleva el mulch y la tierra por encima de la acera con cada tormenta.

    Cómo se ve un drenaje correcto

    • Capacidad acorde al techo. La corrida se dimensiona por el área que le drena, no por lo que combina con la casa.
    • Suficientes salidas. Un bajante por cada 30 a 40 pies de corrida, más donde el área de captación es grande.
    • Caída hacia las salidas. Alrededor de un cuarto de pulgada por cada diez pies, para que no quede nada parado en el canal.
    • Sujeción firme. Soportes ocultos sobre fascia sana cada dos pies, para que una tormenta no se lleve la corrida.
    • Descarga bien lejos del edificio. De cuatro a seis pies mínimo, sobre terreno que drene y en pendiente hacia afuera.
    • Nada tupido. La capacidad que no se puede usar no es capacidad.

    Antes de la temporada, no durante

    La ventana útil para este trabajo es la primavera, antes de que la temporada de lluvia agarre fuerza. Cuando ya las tormentas llegan todas las semanas, todas las compañías de canaletas de Miami-Dade y Broward están llenas, y el trabajo se hace entre aguaceros.

    Si va a hacer una sola cosa, camine el perímetro durante la próxima lluvia fuerte y mire a dónde va el agua. Un desborde, un chorro bajando por la pared o un charco contra la losa le dicen más en cinco minutos que una inspección en día seco.

    Joya General Services Gutter LLC diseña e instala drenaje pluvial en Opa-locka, Miami y Fort Lauderdale. Llame al (786) 302-1221 y vamos a decirle qué está haciendo su techo con el agua.